

Key Takeaways
- Assess the entire house before starting: Identify structural, plumbing, electrical, roofing, drainage, ventilation, and safety issues before focusing on cosmetic upgrades.
- Use a room-by-room approach: Create a separate checklist for kitchens, bathrooms, bedrooms, living spaces, laundry areas, hallways, and outdoor areas to avoid overlooking important details.
- Prioritise function before aesthetics: Focus first on layout, storage, lighting, comfort, durability, and essential systems before choosing decorative finishes.
- Coordinate renovation work carefully: Plan structural, plumbing, electrical, heating, cooling, insulation, flooring, cabinetry, and finishing work in the right sequence.
- Set a realistic budget: Account for labour, materials, demolition, permits, waste disposal, appliances, and a contingency fund for unexpected problems.
- Inspect every room before completion: Test plumbing, electrical fixtures, appliances, doors, windows, ventilation, heating and cooling systems, and safety features during the final walkthrough.
- Plan for long-term maintenance: Keep renovation records, warranties, and installation dates while establishing regular maintenance routines to protect the home’s condition and value.
Renovating an entire house can feel overwhelming when every room seems to require a different set of decisions. Kitchens need careful planning for appliances and plumbing, bathrooms demand attention to moisture and ventilation, while bedrooms may focus more on comfort, storage, and lighting. A room-by-room approach makes a large renovation easier to organise because it allows homeowners to identify priorities, coordinate systems, establish realistic budgets, and avoid overlooking important details.
Whether you are updating an older property, preparing a recently purchased house, or improving your current home, a structured checklist can help you move from the initial planning stage to the finishing touches with greater confidence and fewer surprises.
Where Should You Start When Renovating a House?
Before tackling individual rooms, establish a whole-house renovation plan. Looking at each space independently can make it tempting to begin with whichever room feels most exciting, but major renovation work is interconnected. Moving a wall may affect electrical wiring, plumbing, flooring, heating or cooling, and the layout of an adjacent room. Similarly, replacing windows or upgrading insulation can influence comfort throughout the property rather than in just one area.
Start by assessing the condition of the entire house and identifying urgent repairs before focusing on cosmetic improvements. Structural concerns, water damage, roof problems, outdated electrical systems, plumbing defects, and drainage issues should generally receive priority. Once the property’s fundamental needs are understood, you can organise room-specific improvements around a realistic budget and construction sequence.
Begin With a Whole-House Assessment
Walk through every room and record what needs to be repaired, replaced, upgraded, or simply refreshed. Take photographs and measurements where useful, and note problems that may not be immediately visible, such as dampness, unusual smells, cracks, poor ventilation, or signs of previous water damage.
Your initial assessment should consider:
- Structural condition: Check walls, ceilings, floors, foundations, beams, and other structural components for visible problems.
- Roof and exterior: Look for leaks, damaged materials, poor drainage, deteriorated exterior finishes, and areas where moisture may enter.
- Electrical systems: Identify outdated wiring, insufficient outlets, damaged switches, and areas that may require additional electrical capacity.
- Plumbing: Look for leaks, low water pressure, ageing pipes, drainage problems, and fixtures that need replacement.
- Heating and cooling: Evaluate whether existing systems provide consistent comfort and operate efficiently.
- Insulation and ventilation: Determine whether the house needs better thermal performance or improved airflow.
- Windows and doors: Inspect seals, frames, locks, glazing, and overall condition.
- Safety features: Check smoke alarms, carbon monoxide alarms where applicable, handrails, lighting, locks, and other safety measures.
This assessment gives you a clearer picture of what should happen before cosmetic work begins.
Set Priorities Before Choosing Finishes
Separate renovation tasks into three categories: essential repairs, functional improvements, and aesthetic upgrades. This makes it easier to protect your budget if unexpected costs arise.
For example, repairing a leaking roof should take precedence over installing decorative wall treatments. Fixing damaged plumbing should come before choosing premium bathroom finishes. Addressing an unsafe electrical system should take priority over adding decorative lighting.
A renovation also becomes easier to manage when you establish a contingency fund for unforeseen work. Older homes, in particular, can reveal hidden problems once walls, ceilings, flooring, or cabinetry are removed.
What Should Be Included in a Kitchen Renovation Checklist?
The kitchen is one of the most complex rooms to renovate because it combines cabinetry, appliances, plumbing, electrical systems, lighting, flooring, ventilation, and everyday movement. A successful renovation should therefore begin with how the kitchen will actually be used rather than simply how it will look in photographs. Consider who cooks, how often meals are prepared, where groceries are stored, whether several people use the space simultaneously, and how the kitchen connects with dining and living areas. A detailed checklist can prevent expensive mistakes involving appliance clearances, work surfaces, storage, lighting, and utility connections while helping you create a kitchen that remains practical long after the renovation is finished.
Kitchen Renovation Checklist
Before construction begins, review each of the following:
- Assess the layout: Determine whether the existing arrangement supports efficient movement between food storage, preparation, cooking, and cleaning areas.
- Plan cabinetry: Measure available wall and floor space carefully, including corners and areas around windows and doors.
- Review storage: Include drawers, cupboards, pantry storage, recycling areas, and specialised storage for frequently used equipment.
- Plan appliance locations: Confirm the size, ventilation, electrical requirements, and clearances for refrigerators, ovens, dishwashers, cooktops, and other appliances.
- Check plumbing: Identify the locations of sinks, dishwashers, water lines, waste pipes, and other plumbing connections.
- Upgrade electrical capacity: Plan enough outlets for countertop appliances and ensure major appliances have appropriate connections.
- Improve lighting: Combine general illumination with task lighting beneath cabinets and focused lighting in food preparation areas.
- Consider ventilation: Make sure cooking fumes, heat, and moisture can be properly removed.
- Choose durable surfaces: Select countertops, flooring, splashbacks, and cabinet materials that can withstand frequent use.
- Review flooring: Choose a surface that is durable, easy to clean, and suitable for the room’s moisture and traffic levels.
- Allow sufficient workspace: Avoid overcrowding countertops with appliances or unnecessary decorative elements.
- Plan waste management: Include convenient areas for rubbish, recycling, and food waste.
Which Kitchen Improvements Should Come First?
Start with layout and infrastructure before selecting colours or decorative finishes. Plumbing, electrical work, ventilation, walls, flooring, and cabinetry can all affect later decisions.
If you are changing the position of major appliances or moving a sink, plan these changes before ordering cabinetry. Confirm measurements against actual products rather than relying solely on generic dimensions. Small inaccuracies can create major problems once cabinets and appliances are installed.
How Can You Renovate a Living Room for Better Everyday Use?
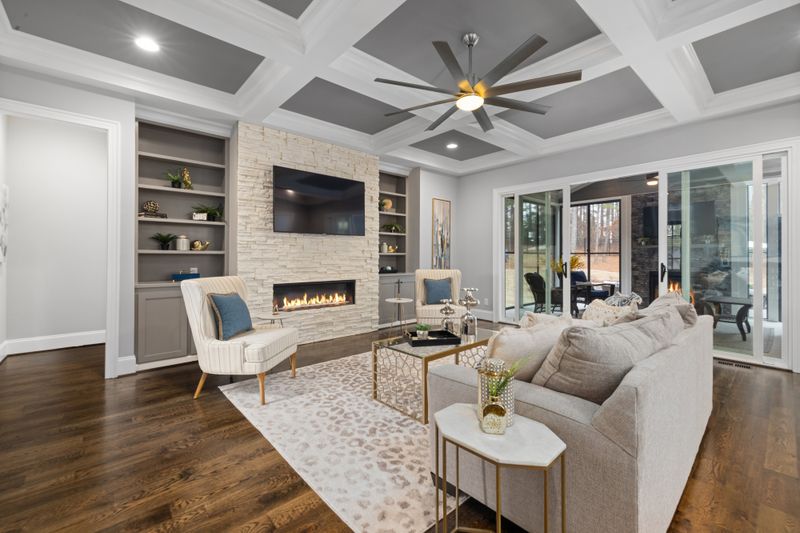
Living rooms often serve several purposes at once. They may be used for entertaining, relaxing, watching television, reading, working, or spending time with family. Renovating this space therefore requires more than choosing a new colour scheme. Consider how furniture will be arranged, where people naturally walk through the room, how much storage is needed, and whether the space receives enough daylight. Electrical outlets, lighting, heating and cooling, flooring, windows, and built-in storage can all have a major effect on usability. A thoughtful renovation should make the living room comfortable for everyday activities while retaining enough flexibility to accommodate changing needs, furniture arrangements, and household routines.
Living Room Renovation Checklist
Review these areas before beginning work:
- Evaluate the layout: Identify awkward circulation routes, unused corners, and furniture arrangements that make the room feel cramped.
- Check wall conditions: Repair cracks, damaged plaster, holes, or other surface defects before applying new finishes.
- Review flooring: Determine whether existing flooring can be repaired or refinished or whether replacement is necessary.
- Plan electrical outlets: Add outlets where furniture, entertainment equipment, lamps, or work areas will require them.
- Improve lighting: Combine overhead lighting with lamps, wall fixtures, and accent lighting where appropriate.
- Assess natural light: Check window condition, glazing, curtains, blinds, and other features affecting daylight.
- Plan storage: Consider built-in shelving, cabinetry, media storage, or concealed storage for everyday items.
- Review heating and cooling: Ensure vents, radiators, fans, or other systems are positioned effectively.
- Consider acoustics: Soft furnishings, rugs, curtains, bookshelves, and appropriate wall treatments can help control sound.
- Plan technology: Account for television locations, internet equipment, speakers, charging points, and other technology.
How Do You Make the Living Room More Flexible?
Avoid designing the space around one fixed furniture arrangement unless that arrangement is unlikely to change. Keep pathways clear and provide enough electrical access for different configurations.
If the living room connects directly with a dining room or kitchen, consider how the spaces relate visually and functionally. Consistent flooring, complementary finishes, and coordinated lighting can create continuity without making every room identical.
What Should You Check Before Renovating the Bedrooms?
Bedrooms should prioritise comfort, privacy, storage, lighting, and healthy indoor conditions. Although they may involve fewer complicated systems than kitchens or bathrooms, small planning mistakes can affect how restful and functional the room feels every day. Think about bed placement, wardrobe access, natural light, ventilation, temperature control, and electrical outlets before deciding on decorative finishes. If bedrooms are being renovated for children, teenagers, guests, or older family members, their requirements may differ significantly.
Planning for those differences can make the renovation more useful over time. A bedroom renovation should create a calm and practical environment rather than simply producing a visually attractive room that becomes difficult to use.
Bedroom Renovation Checklist
Before renovating each bedroom, consider:
- Measure the room: Record wall lengths, ceiling height, window locations, doors, wardrobes, and other fixed elements.
- Plan furniture placement: Establish where the bed, bedside tables, wardrobes, desks, and other furniture will go.
- Improve storage: Consider built-in wardrobes, drawers, shelving, or under-bed storage.
- Check lighting: Provide general lighting as well as bedside and task lighting.
- Add convenient outlets: Position electrical outlets near beds, desks, and other areas where devices are regularly used.
- Review windows: Inspect seals, frames, glazing, curtains, blinds, and privacy considerations.
- Improve ventilation: Make sure fresh air can circulate effectively and that moisture does not become trapped.
- Assess insulation: Check whether walls, ceilings, floors, or windows need improvement to maintain comfortable temperatures.
- Choose suitable flooring: Consider warmth, durability, maintenance, and noise when selecting flooring.
- Plan privacy: Evaluate doors, window coverings, sound transmission, and the bedroom’s position within the house.
Should Bedrooms Be Designed for Future Needs?
Where possible, allow rooms to adapt. A child’s bedroom may eventually become a study or guest room, while a guest bedroom could later serve as a home office.
Flexible electrical access, adequate storage, durable finishes, and sensible furniture clearances can make a bedroom easier to repurpose. These decisions are particularly useful when planning long-term renovations rather than short-term cosmetic updates.
How Do You Approach a Bathroom Renovation?
Bathrooms require particularly careful planning because they combine water, electricity, ventilation, drainage, fixtures, waterproofing, and finishes within a relatively small area. Mistakes involving moisture management can create expensive problems behind walls and beneath floors, making proper preparation essential. Before selecting tiles or tapware, assess the condition of the plumbing, waterproofing, ventilation, flooring, walls, and subfloor.
Think about how many people use the bathroom, whether it needs additional storage, and whether the existing layout makes good use of the available space. A bathroom renovation should improve function and durability first, with appearance serving as an important but secondary consideration.
Bathroom Renovation Checklist
Use this checklist to guide your planning:
- Inspect plumbing: Check pipes, drains, water pressure, valves, and existing fixtures.
- Assess waterproofing: Identify whether existing waterproofing is adequate and whether it needs professional attention.
- Check ventilation: Ensure moisture can be effectively removed to reduce the risk of mould and condensation.
- Review the layout: Consider the location and clearance of the toilet, vanity, shower, bath, and storage.
- Plan lighting: Use appropriate general and task lighting, particularly around mirrors and grooming areas.
- Evaluate electrical requirements: Plan outlets and electrical installations according to applicable safety requirements.
- Choose moisture-resistant materials: Select suitable flooring, wall finishes, cabinetry, and other materials.
- Plan storage: Include drawers, vanity storage, recessed shelving, cabinets, or other practical solutions.
- Review fixtures: Check dimensions, water efficiency, accessibility, durability, and maintenance requirements.
- Consider drainage: Ensure floor gradients and drainage arrangements are suitable for the planned design.
- Select slip-resistant flooring: Prioritise safety in areas exposed to water.
- Plan towel and accessory locations: Decide where hooks, rails, toilet paper holders, and other accessories should be installed before walls are finished.
What Bathroom Problems Should Never Be Covered Up?
Do not use new finishes to hide underlying leaks, damaged flooring, mould caused by poor ventilation, deteriorating plumbing, or failed waterproofing. Cosmetic work may temporarily conceal symptoms while allowing the underlying problem to become more severe.
Resolve moisture and structural issues first. This is especially important when renovating older properties where previous repairs may have been incomplete or unsuitable.
What Should Be on a Home Office or Study Renovation Checklist?
Home offices have become increasingly important in modern households, but they should be planned around real working habits rather than simply adding a desk to an unused room. A productive workspace needs adequate lighting, comfortable proportions, reliable connectivity, sufficient electrical access, storage, and appropriate acoustics. If the room will serve multiple purposes, flexibility becomes even more important.
A study may need to function as a guest room, homework area, creative space, or quiet retreat at different times. Planning these requirements during renovation can reduce clutter and make the room significantly more useful. Even small details, such as outlet placement and window glare, can affect everyday comfort and productivity.
Home Office Renovation Checklist
Consider the following:
- Choose the workstation location: Position desks to benefit from natural light while reducing glare on screens.
- Plan electrical outlets: Provide convenient access for computers, monitors, chargers, printers, lamps, and other equipment.
- Improve internet connectivity: Consider wired connections or appropriate network equipment where reliable connectivity is essential.
- Add storage: Include shelves, cabinets, drawers, or other solutions for documents and equipment.
- Improve lighting: Combine natural light with suitable task and ambient lighting.
- Consider acoustics: Reduce distracting noise through doors, furnishings, floor treatments, or other appropriate measures.
- Plan background appearance: If video meetings are common, consider what will appear behind the workstation.
- Provide ventilation: Ensure the room remains comfortable during long periods of use.
- Allow flexibility: Choose a layout that can accommodate changing work requirements.
What About the Dining Room and Other Shared Spaces?
Dining rooms and shared spaces are sometimes overlooked because they appear simpler than kitchens and bathrooms. However, these areas often connect several parts of the house and can influence how people move between rooms. A dining area should provide enough space for chairs to be pulled out comfortably, while shared spaces may need to accommodate storage, hobbies, homework, entertaining, or other household activities.
Consider sightlines, lighting, flooring, heating and cooling, and the relationship between neighbouring rooms. If walls are being removed or openings changed, carefully assess how the renovation affects structural elements and the overall circulation of the house. Well-planned connections can make multiple rooms feel larger and more useful.
Dining and Shared-Space Checklist
- Measure dining furniture: Allow sufficient clearance around tables and chairs.
- Plan lighting: Position fixtures appropriately over tables and provide additional ambient lighting.
- Review flooring: Select durable flooring that works with adjacent rooms.
- Consider storage: Add cabinets, shelving, or furniture that can accommodate dining and household items.
- Assess room connections: Look at how the dining space connects with the kitchen, living room, or outdoor areas.
- Check outlets: Include electrical access for lighting, charging, and occasional equipment.
- Improve circulation: Ensure doorways and pathways remain comfortable when the room is occupied.
- Consider flexibility: Plan for gatherings and different table configurations where possible.
How Should You Plan Laundry and Utility Areas?
Laundry and utility rooms may not receive the same design attention as kitchens and living rooms, but they contain essential appliances, plumbing connections, ventilation requirements, and storage needs. Because these spaces frequently deal with water, heat, moisture, cleaning products, and heavy equipment, durability should be a priority. Think about where washing machines, dryers, sinks, cleaning supplies, laundry baskets, and drying areas will be positioned.
Good organization can make routine household tasks easier while also reducing the risk of leaks, clutter, and moisture-related damage. During renovation, inspect existing plumbing and electrical connections and make sure the room has suitable ventilation and adequate space around appliances.
Laundry Renovation Checklist
- Inspect water connections: Check supply lines, valves, hoses, waste connections, and drainage.
- Plan appliance locations: Allow appropriate clearances for washing machines and dryers.
- Improve ventilation: Provide adequate airflow to manage moisture and heat.
- Add storage: Include cabinets or shelves for detergents, cleaning products, linens, and household supplies.
- Plan a work surface: A durable counter can provide useful space for sorting and folding laundry.
- Consider drying space: Include an appropriate area for air-drying clothes if required.
- Protect flooring: Choose durable, moisture-resistant flooring that is easy to maintain.
- Review electrical connections: Ensure appliances have suitable electrical supplies and safe outlet placement.
- Consider a utility sink: A sink can be useful for handwashing, soaking, cleaning, and other household tasks.
What Should You Check in Hallways, Entryways, and Staircases?
Circulation areas are easy to overlook because they are not usually considered destinations within the home. Nevertheless, hallways, entryways, landings, and staircases connect every major room and contribute significantly to safety and everyday convenience. Renovating these areas can also reveal opportunities to improve storage, lighting, accessibility, and visual continuity. Entryways need practical surfaces and convenient places for coats, shoes, bags, and other frequently used items. Staircases require particular attention to safety, lighting, handrails, and the condition of steps. Before changing walls or openings, confirm whether any affected components are structural. Even relatively minor improvements can make these transitional spaces safer and easier to navigate.
Entry and Circulation Checklist
- Inspect flooring: Repair damaged surfaces and choose durable materials for high-traffic areas.
- Improve lighting: Ensure hallways, stairs, landings, and entrances are adequately illuminated.
- Check handrails: Inspect stair rails, balustrades, steps, and other safety features.
- Plan entry storage: Add hooks, benches, cabinets, shelving, or other practical storage where space permits.
- Review doors: Check hinges, locks, handles, frames, and overall condition.
- Improve accessibility: Consider whether pathways, thresholds, stairs, and lighting create unnecessary obstacles.
- Check wall condition: Repair cracks, dents, and other damage before refinishing.
- Coordinate finishes: Use complementary materials to create visual continuity between connected rooms.
What Should You Include When Renovating Outdoor Areas?
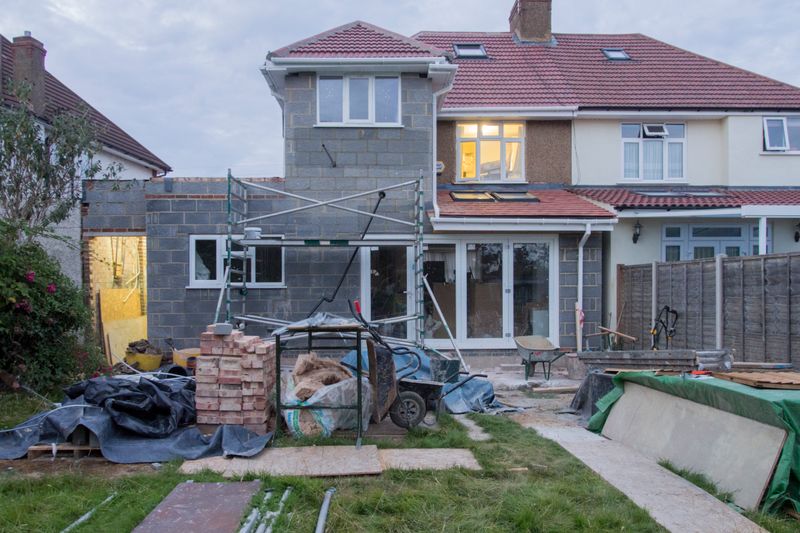
A complete house renovation should not stop at the interior. Outdoor areas influence how the property is used, how water drains away from the building, and how the home connects with its surroundings. Patios, decks, gardens, pathways, fences, driveways, and outdoor entertaining areas may all require attention. Before investing in decorative landscaping, check practical concerns such as drainage, grading, exterior walls, roofing, gutters, and surface conditions.
Outdoor improvements should also be coordinated with interior renovations where doors, windows, extensions, or new living areas are involved. If you are designing a home that fits your lifestyle, outdoor spaces should be considered alongside indoor rooms rather than treated as an afterthought.
Outdoor Renovation Checklist
- Inspect drainage: Make sure water flows away from the house and does not collect near foundations or exterior walls.
- Check gutters and downpipes: Repair leaks, blockages, or damaged components.
- Review exterior walls: Look for cracks, deteriorated finishes, moisture damage, or areas requiring repair.
- Assess outdoor surfaces: Inspect patios, decks, paths, steps, and driveways for damage or uneven areas.
- Review fencing: Repair or replace damaged sections and check gates for proper operation.
- Plan outdoor lighting: Improve safety and usability around entrances, paths, stairs, and entertaining areas.
- Consider landscaping: Choose plants and layouts appropriate for available space, climate, maintenance requirements, and drainage.
- Plan outdoor living: Consider seating, shade, cooking, storage, and entertainment needs.
- Coordinate exterior doors: Ensure new doors provide suitable security, weather protection, and access.
How Do You Coordinate the Renovation From Room to Room?
A room-by-room checklist works best when it is combined with a whole-house construction sequence. Completing every room independently can lead to duplicated work, inconsistent finishes, or systems that need to be opened again later. For example, electrical and plumbing work should generally be coordinated before walls are closed. Flooring may need to be completed at a particular stage depending on cabinetry and other installations. Painting can also be disrupted if heavy construction continues afterward. Establishing a logical sequence helps trades work efficiently and reduces the chance of damaging completed areas. It also makes it easier to track costs, deliveries, inspections, and decisions throughout a large renovation.
A Practical Renovation Sequence
While every project is different, a typical sequence may include:
- Initial inspection and planning: Document the house’s condition, establish priorities, and determine the renovation scope.
- Design and measurements: Finalise layouts, dimensions, materials, fixtures, and major design decisions.
- Approvals and permits: Determine which renovation activities require professional approvals or permits.
- Structural work: Complete required structural repairs, wall changes, extensions, or other major alterations.
- Roof and exterior repairs: Address water entry and major external defects.
- Plumbing and electrical rough-ins: Install or relocate systems before walls and ceilings are closed.
- Heating, cooling, and ventilation work: Coordinate major mechanical systems with the final layout.
- Insulation and wall preparation: Complete insulation and prepare surfaces for finishing.
- Flooring and major installations: Install flooring, cabinetry, doors, and other large components according to the project’s sequence.
- Painting and finishing: Complete walls, ceilings, trim, fixtures, hardware, and decorative details.
- Final installations: Install appliances, lighting, accessories, and remaining fixtures.
- Inspection and cleanup: Test systems, identify defects, clean the property, and complete final adjustments.
How Can You Keep Your Renovation Budget Under Control?
Budget management is one of the most important parts of renovating an entire house. Costs can increase quickly when multiple rooms are involved, particularly if hidden defects are discovered after construction begins. A room-by-room budget makes spending easier to track because you can see which areas require the greatest investment and which upgrades can be postponed. Separate essential work from optional improvements and maintain a contingency allowance for unexpected repairs. It is also important to compare complete project costs rather than focusing solely on individual products. Installation, preparation, demolition, waste removal, delivery, labour, permits, and finishing work can all contribute significantly to the final cost.
Build a Room-by-Room Budget
Create a budget that accounts for:
- Design and planning: Include professional design, measurements, surveys, and other preparation costs where applicable.
- Demolition: Account for removal, disposal, and preparation of existing materials.
- Structural work: Allow for repairs, framing, wall alterations, and other major construction.
- Plumbing and electrical: Include both rough-in work and final fixtures.
- Materials: Budget for flooring, cabinetry, countertops, tiles, paint, doors, windows, and other finishes.
- Appliances: Include kitchen, laundry, heating, cooling, and other major appliances.
- Labour: Obtain clear estimates and understand what is included.
- Waste disposal: Renovation debris can represent a significant additional cost.
- Contingency: Keep funds available for unforeseen problems.
Prioritise improvements based on safety, durability, functionality, and long-term value rather than trying to upgrade every component at once. Some of the best home improvements are those that solve underlying problems or make everyday living easier rather than simply adding visual appeal.
What Should You Do Before the Renovation Is Finished?
The final stage of a renovation deserves just as much attention as the planning stage. A property can appear finished while still containing incomplete installations, damaged surfaces, poorly adjusted doors, leaking fixtures, or electrical and plumbing issues that have not been identified. Before considering the project complete, walk through every room using your original checklist and compare the finished work with the agreed plans.
Test appliances, lights, taps, drains, doors, windows, heating and cooling equipment, and other systems. Look carefully at surfaces under good lighting and record defects that need correction. Completing this inspection before final sign-off can make it easier to resolve outstanding problems.
Final Renovation Checklist
Use a final walkthrough to check:
- Walls and ceilings: Look for cracks, uneven finishes, marks, holes, or incomplete painting.
- Floors: Check for damage, uneven transitions, gaps, stains, or unfinished edges.
- Doors and windows: Confirm that they open, close, lock, and seal properly.
- Cabinetry: Test drawers, doors, hinges, handles, and internal storage.
- Plumbing fixtures: Check taps, showers, toilets, sinks, drains, and visible connections for proper operation.
- Electrical fixtures: Test switches, lights, outlets, and other installed equipment.
- Appliances: Confirm that appliances operate correctly and have appropriate connections.
- Ventilation: Test bathroom fans, rangehoods, and other ventilation systems.
- Heating and cooling: Verify that equipment operates as expected.
- Safety features: Test smoke alarms and inspect stairs, handrails, locks, and other safety elements.
- Exterior areas: Check gutters, drainage, doors, paths, fences, and outdoor surfaces.
- Documentation: Keep warranties, product information, manuals, invoices, permits, and relevant project records.
How Can You Make Your Renovated House Work Better Long Term?
A successful renovation should be evaluated by more than its appearance on completion day. The strongest projects improve the way a house performs, supports everyday routines, and adapts to future changes. Once the renovation is complete, establish simple maintenance routines for the new materials and systems. Keep records of when appliances, heating and cooling equipment, roofing components, plumbing fixtures, and other major systems were installed. Review the house periodically for signs of moisture, deterioration, or emerging maintenance needs. It is also worth assessing how each room functions after several months of normal use. If something consistently feels inconvenient, that experience can guide future improvements without requiring another major renovation.
Build a Post-Renovation Maintenance Plan
Protect your investment by:
- Keeping documentation organised: Store warranties, manuals, invoices, drawings, and product details together.
- Recording installation dates: Knowing when major systems and appliances were installed makes future maintenance easier.
- Checking for leaks: Inspect bathrooms, kitchens, laundry areas, roofs, gutters, and visible plumbing connections regularly.
- Maintaining ventilation: Keep exhaust fans, filters, vents, and other ventilation components clean and functional.
- Monitoring energy use: Changes in energy consumption may reveal problems with appliances or heating and cooling systems.
- Inspecting exterior areas: Look for cracks, damaged finishes, blocked drainage, or signs of moisture.
- Maintaining finishes: Follow appropriate cleaning and maintenance recommendations for flooring, countertops, cabinetry, and other materials.
- Reviewing household needs: As routines change, identify small improvements that could make rooms more convenient.
Final Thoughts
Renovating a house is easier to manage when the project is broken into clear, practical stages. A room-by-room approach helps homeowners understand what each space needs while keeping sight of the larger systems that connect the entire property. From the kitchen and bathroom to bedrooms, living areas, utility spaces, hallways, and outdoor areas, every part of the house can benefit from careful assessment and purposeful planning.
The goal is not simply to create rooms that look new. It is to build a home that is safer, more comfortable, efficient, durable, and practical for the people who live there. By prioritising essential repairs, coordinating trades, controlling costs, and checking every detail before completion, homeowners can approach renovation with greater confidence and create improvements that continue to provide value for years to come.